‏إظهار الرسائل ذات التسميات android root. إظهار كافة الرسائل

الثلاثاء، 5 ديسمبر 2017

How to Root Tecno W4 All Firmwares

This tutorial gives detail insights on how to root Tecno W4. To root Tecno W4, you need to use a slightly different approach since it is shipped with android 6.0 Marshmallow.

android root

Here, you have all the tools and files needed to root your Tecno W4, meanwhile, you should make a complete backup of your ROM and other important files before you proceed.
Disclaimer:
OlassTech, TeamWIN Recovery or any other parties relating to the development of the Recovery.img and other files that are used in this tutorial are not responsible for your actions, thus; if your device is damaged, got bricked or any other loss you may suffer as a result of this upgrade. Upgrade at your own discretion and endeavor to follow the instructions for rooting your Tecno W4 carefully.

Since the method discussed here is a little lengthy, you might want to try the latest Kingroot version which can be download from here: All Kingroot Versions Download Link

Kingroot is a one-click root application for most android devices. Its procedures are simple. You only have to install the app and then, lunch it on the phone. Follow the on-screen commands from Kingroot until your phone is rooted.

In case Kingeoot fails to root your Tecno W4, you may follow the guides given below;

How to Root Tecno W4

If Kingroot could not root your Tecno W4 because of the firmware, your next available option is to flash SU Script via the recovery. I mean custom recovery.

Below here is the step by step guide on how to do that.

1. Download and Install VCOM drivers on your PC. See here: How to Install VCOM Drivers 
2. Download flashable SuperSU script zip from here.

3. Copy SuperSU.zip you have downloaded to the phone’s SD card or internal storage. Better yet, you may copy it on both storage.

4. Download and flash TWRP for Tecno W4 on your phone. See here: TWRP for Tecno W4.

5. Boot the phone into recovery mode by presaing Volume up + Power buttons.
 From TWRP, if you get a prompt asking you to swipe to allow TWRP modify the system partition then go ahead and swipe.

6. From TWRP recovery, tap Install then, Navigate to the location of the SuperSU.zip you downloaded and select it.
Swipe to confirm flashing of the SuperSU.zip and wait till flashing is complete.

7. Reboot your Tecno W4. Wait few seconds for the phone to initialize.
By now, SuperSU should be visible on your App Drawer and you can also confirm that your Tecno W4 is rooted using Root checker from the Play Store.

If this piece of info was useful to you, please share to help others.

السبت، 2 ديسمبر 2017

How to Root Huawei Honor Holly

If you are here, you have definitely been looking for a way to root your Huawei Holly which is exactly what I discuss here.

I will keep this guide as brief, simple and understandable as possible. Just make sure you carefully follow the step by step guides given so that you may be able to root your Huawei Holly successfully.

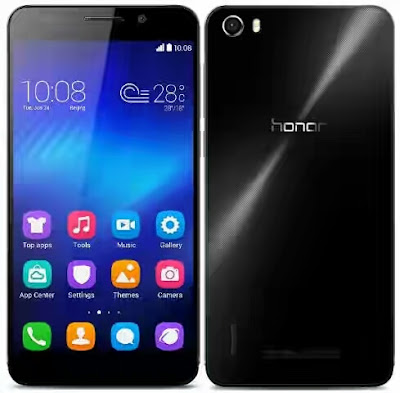
Huawei Holly

How to Root Huawei Holly: Step by Step Guide

1. Download the root tools whose download link is given below.
    Huawei Holly Root Tools Download Link
In the file, I have contained all the tools needed to root your Huawei Holly.

2. Extract the downloaded file into a folder on your PC.

3. Now, install the app and drivers contained in the folder in the following sequence. [ Important! ]
    1. ADB Installer 1.4.2
    2. Handset_WinDriver_1.00.00.31
    3. DriverAutoInstaller_v1.1236.00
    4. iRoot 1.7.9.10454
4. Connect your Huawei Holly via a compatible USB cable to the PC and choose to connect as USB Storage.
NOTE:
    1. It is very important that you use a compatible USB CABLE. In my case, I used a factory-cable by Samsung before I could get it to work. You may use Huawei own cable or any other USB 3.0 cable.

    2. Do not mount as storage else your SD Card will become inaccessible and the root operation will fail.
5. Enable USB Debugging on the device.

6. Open the iRoot app and let it detect your phone. Make sure you have an active internet connection on the PC, so that it can download the drivers and install it automatically.

7. After that, the iRoot will install 3 Chinese apps on your phone. Do not do anything with it, let it complete on its own.

8. All things being equal, you will see the green Root button appear on your PC. Click on it.

9. Make sure that your phone has enough battery charge to complete the rooting operation and that you have reliable power supply on your PC.
Any interruption after you click the Root button in iRoot can make your phone unusable. So take huge precautions during the process. (You've been warned now)

10. This may last a few minutes depending on the speed of your Internet connection. The phone will restart as soon as the process is complete. The progress bar is also displayed on iRoot.

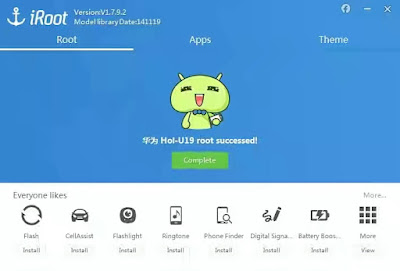
11. On successful operation, iRoot will display the success notification and by now, your Huawei Holly is rooted.

iRoot Root Success Notification

Congratulations! Your Huawei Holly has now been successfully rooted.

Extra Steps:

1. Although, iRoot has installed it's own Root Manager, you may decide to install SuperSU or Super User from Play Store and replace iRoot root manager with it.

2. If you wish to uninstall the Apps installed on your Huawei Holly by iRoot, you may do so by installing Root Cleaner on your phone and use it to uninstall those apps.

3. Remember to update your SU Binaries when you install SuperSU or Super User to better help you manage the root privilege on the phone.

If this piece of info was useful to you, please share to help others.